Between 1-7 February 2021, it is Children’s Mental Health Week and this year’s theme is express yourself. What better way to do that than through art. From painting and drawing to colouring in and making something, there are other forms of art that can be explored by children.
One of my favourite techniques is incorporating various materials into my art, such as doilies, fabric, old maps and music sheets or cuts from my own art prints. From this to proposing a collage project for children is just a matter of actually doing it and presenting it here. And what an enjoyable activity this was! 😊
For today’s project, I am proposing making a flower collage using old newspapers and magazines. This is something that I learnt a few decades ago when I was in school and I had a very cool art teacher who was also a known artist in the city where I grew up in Romania, Cluj-Napoca. I learnt a lot from her art classes, about perspective, shadowing, proportions and colour theory. But I vividly remember one particular lesson (actually it took us a few good lessons to finish this) when the task was to create an image using only cuts from old magazines and newspapers. It turned out to be one of my favourite art projects when I was in school.
I have been meaning to revisit this for a long, long time and I feel that now it’s the right time to do it. Combining my knowledge from my day job as a Bilingual Support Teacher with my passion for art, I wanted to give parents and children an idea of how their children can express themselves through art. So, let's get straight into it!
You will need:
- Old newspapers and magazines
- Glue or Mod Podge
- Pencil
- A piece of paper for your design
- Optional: scissors, felt pens, paints and brush
Step 1:
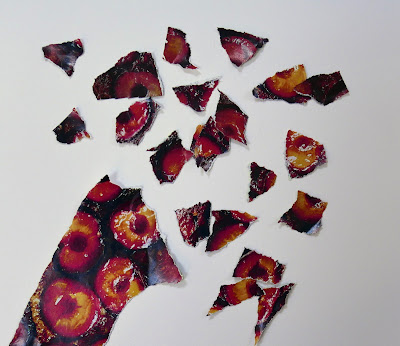
Start by choosing your paper. Look for interesting patterns as well as texts with a coloured background. Here are a few examples.
Step 2:
Tear off the chosen paper into small pieces. You can use scissors if you prefer.
Step 3:
Keep the torn pieces from the same design together or group them by colour. This will help you decide how to use them best. Some patterns may be more suitable for flowers, some for trees and some for clouds for example.
Step 4:
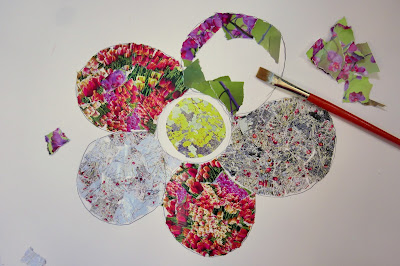
Draw your design. Here, I am showing you a flower, but you can draw anything you like: a tree, a car, a house, an animal or even a landscape. Alternatively, you can find free images on the internet so you can use your favourite cartoon character or a scene from a story. The possibilities are endless. Why not start with something easy and once you mastered the technique, have a go at a more complex design.
Step 5:
Decide which pattern you’ll use for each petal and place the torn paper accordingly as shown in the below image. This will help you decide on the best combination for your design. You can use the same pattern for every petal, a different pattern for each petal or a mixture of both. For the middle part, I simply cut a round shape from an image that I thought it goes well with the other patterns, but you can be as creative as you like (you can colour it with paints, felt pens or pencils if you prefer).
Step 6:
Glue the pieces. I used Mod Podge which is a white glue that dries off transparent and it can be applied with a brush, but you can use any glue you have. Remember: the finished piece doesn’t need to be perfect so don’t worry if you missed a corner or your petals are not perfectly round.
You can try to glue the pieces for the edges first then moving on to the middle part of the petal.
Final step:
The first picture below shows the completed flower design, but if you think that it looks unfinished, you can go even further and add some accents using paints and felt pens like in the second and third pictures.


The flowers can be framed and hang on your wall and it will definitely give your child a great feeling of achievement. If they like this project, they can create more designs and give them to family members as treasured presents.
This project can teach your child quite a few lessons and please feel free to add to the list:
- mindfulness
- being generous
- to care for our planet and loved ones
- creativity is rewarding
- spending time away from devices can be enriching


We could use a mental health art break and this project idea is perfect.
ReplyDeleteHugs,
Kippi
Thank you. It can be used for any break really, including from screen :).
DeleteWhat a lovely project, my kids would have loved doing something like this when they were little. I think the kids are under a lot of pressure at the moment so this is a great idea.
ReplyDeleteI agree, they need some time away from screens and I think that if they do something that comes out of their hand could be so rewarding.
DeleteJust popping by from Folksy to say hi, I love this, my mum used to do this sort of thing with me and my siblings and I loved doing this sort of craft with my kiddies when they were little. The finished piece looks great in the frame. :)
ReplyDeleteAww, thank you :).
DeleteThanks for sharing us. Healthy Memory
ReplyDelete